
Friday, September 13, 2013
Crochet Skirt
I got this pattern as a free download from Ravelry.com. It's called EmmaJean's Minty Green Skirt. It took a while for me to finally finish it, but it was worth the time. I used Hobby Lobby's "I Love this Cotton" in Taupe, so mine is not minty green, obviously. This cotton is nice and soft. I didn't make the frill as long as the pattern calls for. (I'm short and so is the person I was making it for) I was actually thinking of continuing and making it a maxi. Hmm. I'll think about it.


Tuesday, September 3, 2013
Embroidered Name Tag
My first embroidery project came out better than I expected!

So I decided to give embroidery a try. It's not so hard. I used felt and embroidery thread. I colored his name on the felt with a sharpie the way I wanted it to look, using some fancy font in Microsoft Word. Then I did a back stitch along the border of the letters, then a fill stitch to fill it in. I don't think fill stitch is the correct term, but it fills in the letters, so that's what I'm going with.

The border is just single crochet around. I started to do the "fill stitch" around the edge, but it just wasn't working out for me. I didn't realize that I had yellow felt until after I was finished. Oh well, even though it doesn't match, I think it looks better than crossing out the name. I glued on the finished piece with some hot glue. Wala!

Saturday, July 13, 2013
Crochet Tops
I usually do a pretty good job of keeping my work life, home life, and hobbies separated, but lately they've been overlapping. So I'm back after being "missing in action" for quite some time. Although I haven't updated my blog for a while doesn't mean I haven't been crocheting. I've completed two tops and I'm working on some other orders as well.
The first pattern is a Halter Top that came from the book, Contemporary Crochet: 37 European Designs, by Sys Fredens. It's found on page 48 and works up pretty fast. I used worsted weight cotton yarn. The only changes I made was that I made the bust area a little smaller and made the top longer. It came out nice. I think I will put a lining in the bust part so I wouldn't have to wear something under it. It's not too lacy but I wouldn't want to show anything extra, if you know what I mean.
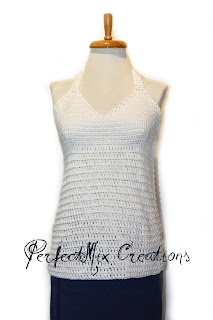


The second top doesn't have a pattern. Well, I did use a specific stitch, but I winged it for the actual shape and construction of the shirt. Originally, I was just going to make two rectangles and attach them together, minus the neck and armholes. As I was working on the front, I decided to make the neckline more of a neckline. I did that by continuing my stitch pattern on the sides that go up the shoulder, and single crocheting in the middle. The backside is just a rectangle. The stitch that I used is from the book Crochet! Techniques, Stitches, Patterns, by Marie-Noëlle Bayard. The stitch is called Closed Garlands and it's found on page 127. I think this was a good stitch for this shirt. I really like the look of this stitch.


The first pattern is a Halter Top that came from the book, Contemporary Crochet: 37 European Designs, by Sys Fredens. It's found on page 48 and works up pretty fast. I used worsted weight cotton yarn. The only changes I made was that I made the bust area a little smaller and made the top longer. It came out nice. I think I will put a lining in the bust part so I wouldn't have to wear something under it. It's not too lacy but I wouldn't want to show anything extra, if you know what I mean.


The second top doesn't have a pattern. Well, I did use a specific stitch, but I winged it for the actual shape and construction of the shirt. Originally, I was just going to make two rectangles and attach them together, minus the neck and armholes. As I was working on the front, I decided to make the neckline more of a neckline. I did that by continuing my stitch pattern on the sides that go up the shoulder, and single crocheting in the middle. The backside is just a rectangle. The stitch that I used is from the book Crochet! Techniques, Stitches, Patterns, by Marie-Noëlle Bayard. The stitch is called Closed Garlands and it's found on page 127. I think this was a good stitch for this shirt. I really like the look of this stitch.


Sunday, April 28, 2013
Show & Tell
Rachel sent me her finished items from my Quick Easy Winter Beanies pattern. This is her first ever crocheted hat and I'm so honored that she chose my pattern! It looks like it turned out great. She said she combined two beanies to make a reversible beanie with two different colors to choose from, or you can flip the bottom up like it shows in her picture. Brilliant! Great job, Rachel, and thanks so much for sending pictures!


I love seeing finished products from my patterns. If you want to be featured on my blog with your finished items, just shoot me an email. If you don't want to be featured but are still willing to share your pics, that's great too! Just let me know in the email if you want me to post your pics or not.


I love seeing finished products from my patterns. If you want to be featured on my blog with your finished items, just shoot me an email. If you don't want to be featured but are still willing to share your pics, that's great too! Just let me know in the email if you want me to post your pics or not.
Saturday, April 6, 2013
Autism Awareness Scarf
 |
| Image from http://adamsfrood42.angelfire.com/Kamaa-Nhanda_Designs.html |

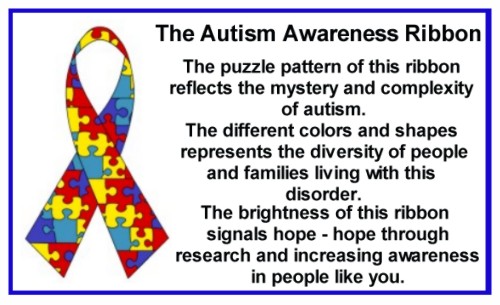
The scarf was requested by a coworker for his son. I found the pattern on Ravelry and it can also be found at this link. It is actually a chart and is made using a Tunisian Crochet Simple Stitch. When I finally figured out how to do it, it became pretty repetitive. All I had to do was follow the chart. I repeated the chart one time, but I think I should have made the scarf a little longer. The pattern says to make two panels and stitch them together back to back. I did not want to make another panel since the first one took so long. Instead, I cut a length of fleece and stitched it to the back. The wrong side of the stitch looks like this, which is why it would need to be covered.

I attached the fleece after blocking. I tried to take pictures, but my camera didn't like all the black. I guess it was too dark. I'm pretty happy with how it turned out. It was really neat to see the picture coming together in the beginning. I have to admit though, about halfway through I was ready to be done, but I kept on and finished the project. If it wasn't requested by someone else, I may have abandoned it.

Sunday, March 17, 2013
Show & Tell
Karen sent me pictures of her floppy sun hats made from my free pattern. They look great! She listed them on ebay.com and can be found by the username "hillbubba". Check out all her listings! Last I checked, I didn't see the sun hats, so maybe they have been sold! How exciting! Thanks for the pictures, Karen!


I love seeing finished products from my patterns. If you want to be featured on my blog with your finished items, just shoot me an email. If you don't want to be featured but are still willing to share your pics, that's great too! Just let me know in the email if you want me to post your pics or not.


I love seeing finished products from my patterns. If you want to be featured on my blog with your finished items, just shoot me an email. If you don't want to be featured but are still willing to share your pics, that's great too! Just let me know in the email if you want me to post your pics or not.
Saturday, February 23, 2013
Brett's Viking Hat
I have recently been challenged with two projects. One is finally done and the other is very close (you will see in the next post). Brett sent me a picture and asked if I could make him a Viking hat with a beard. I almost bought a pattern for the hat, but decided to give it a try before doing that. The first try was a fail, but the second came out pretty good. I found a free pattern for the beard on Ravelry at this link. I also found a free pattern for the horns at this link. I stuffed the horns so they would keep their shape. I really like how it came out.


Wednesday, February 13, 2013
Perfect Fit
Remember the Cloche that I made to felt? It shrunk to the perfect size for my little neighbor. I didn't get a chance to adorn it with anything, but it still looks cute on her.. or maybe she makes the hat look cute. Either way, I think it's cute. She's adorable!


Saturday, February 2, 2013
Show & Tell
Liz sent me some pictures from her visit at the Inauguration in DC this year. She made a red white and blue cloche from my Classic Cloche pattern and adorned it with some Obama buttons. Very creative! She even made a scarf to match. Thank you for the pictures, Liz. I'm glad you and your husband had a great time and a safe trip. The hat looks great on you!


I love seeing finished products from my patterns. If you want to be featured on my blog with your finished items, just shoot me an email. If you don't want to be featured but are still willing to share your pics, that's great too! Just let me know in the email if you want me to post your pics or not.


I love seeing finished products from my patterns. If you want to be featured on my blog with your finished items, just shoot me an email. If you don't want to be featured but are still willing to share your pics, that's great too! Just let me know in the email if you want me to post your pics or not.
Wednesday, January 23, 2013
First Felt
I've never felted anything before. You will probably be able to tell after you see the pictures. I bought some Wool of the Andes from Knit Picks and decided to try it out. The wool is 100% Peruvian Highland Wool. It didn't say super wash so I knew it would felt when washed. The first thing I did was crochet a cloche. I went up two hook sizes, but when I was done it seems to fit almost too good. Maybe the yarn was too bulky, or maybe I need to reevaluate my pattern. There was a little room for shrinkage, but I now know that I need way more room for shrinkage. Here is the before picture.

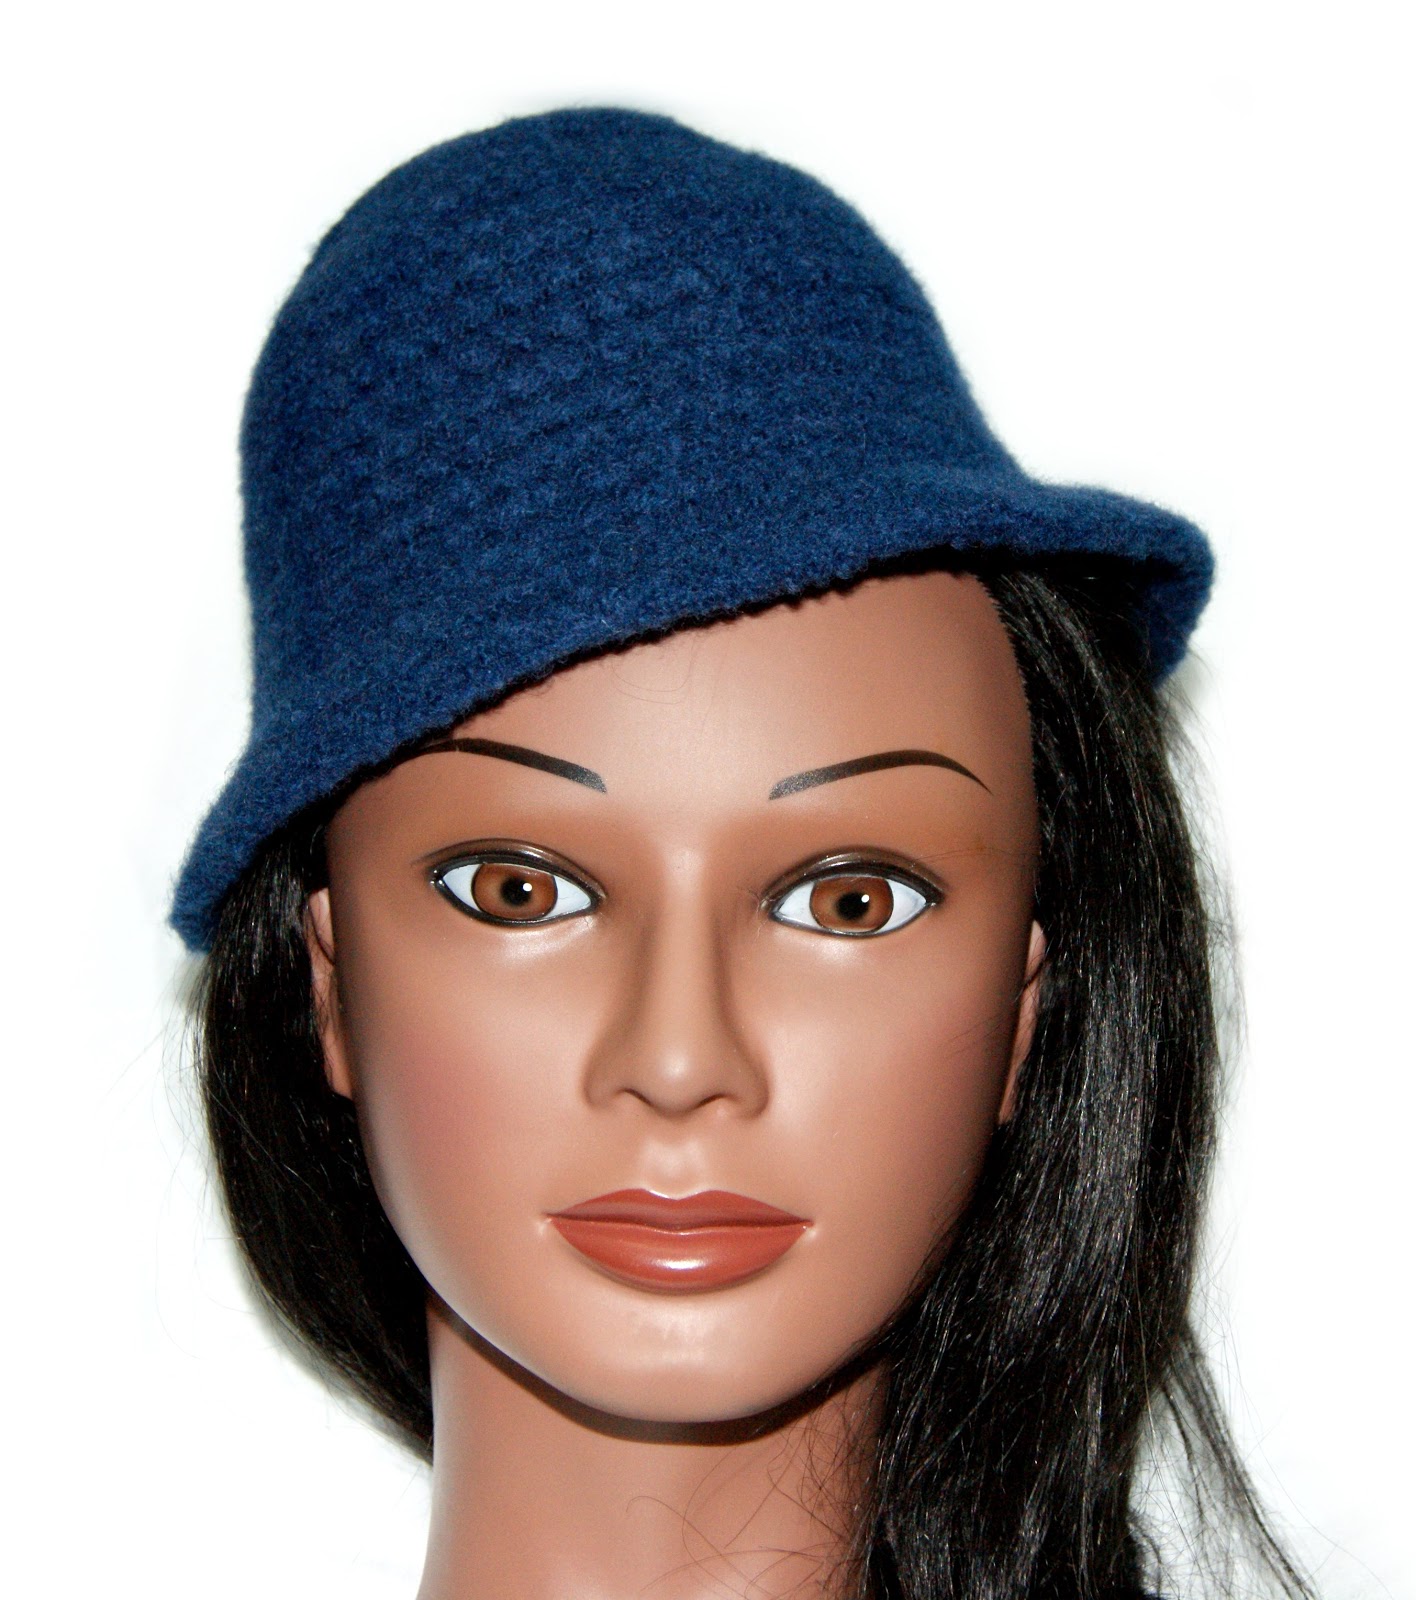
I felted the cloche in the bathroom sinks. I used my sink for hot water and my husband's sink for cold water. I put a little dish soap in the hot water. I scrubbed, squished and agitated the cloche in the hot water, then in the cold water, going back and forth a few times until the wool looked felted. It was a lot more work than I thought. When I was done I squeezed the water out and rolled it in a towel to remove any excess water. I tried to put the cloche on my Styrofoam head to dry, but it did not fit. I left it to dry, standing up, so it wouldn't lose it's round shape. It took a really long time to dry. The finished piece, will probably fit a young child. I'm still thinking of what to embellish it with. I think a ribbon around would look nice and classy.


I felted the cloche in the bathroom sinks. I used my sink for hot water and my husband's sink for cold water. I put a little dish soap in the hot water. I scrubbed, squished and agitated the cloche in the hot water, then in the cold water, going back and forth a few times until the wool looked felted. It was a lot more work than I thought. When I was done I squeezed the water out and rolled it in a towel to remove any excess water. I tried to put the cloche on my Styrofoam head to dry, but it did not fit. I left it to dry, standing up, so it wouldn't lose it's round shape. It took a really long time to dry. The finished piece, will probably fit a young child. I'm still thinking of what to embellish it with. I think a ribbon around would look nice and classy.
Wednesday, January 16, 2013
Rockin' Mohawk Beanie
Here is my Mohawk beanie. I've been wanting to make one for a while. I didn't use a pattern, I just made a basic beanie using half double crochet, added ear flaps, made a single crochet outline in red, and added the braided tassels. For the Mohawk, I cut 4 inch pieces of yarn and latch hooked them, two at a time in the stitches of the beanie making a single line all the way to the back. I thought I would have to put more on the sides to make the hawk a little thicker, but the yarn spreads out nicely. What do you think?


Sunday, January 6, 2013
Isaiah's Beanie
Here is a beanie I made for my son. It's a basic beanie with added ear flaps and some surface crochet on the side. You can't see, but the bottom of the ear flaps have a braided cord with the black and lime yarn. He looks pretty happy with it. I'm happy with it too! The surface crochet of his name on the side took a while, but I really like the way it came out. I thought about putting a "mohawk" on it, but decided it would be too much, so I just left it like this. Maybe I'll do another one with a mohawk and without the surface crochet.


Saturday, December 29, 2012
Head Warmer Video Tutorial


Someone had asked me to make a video tutorial for my Easy Headwarmer Pattern, so I finally got around to doing it. The kids are visiting with my parents so it was the perfect time to do a video without so much background noise. So here is the final cut. I hope everything is clear and easy to understand.
Thursday, December 13, 2012
Show & Tell
Somehow I forgot to get this posted. This is Catherine's beanie made from my pattern, Quick Easy Winter Beanies. Looks like a great hunting beanie to keep someone warm. Awesome work, and thank you for sending the picture, Catherine!

I love seeing finished products from my patterns. If you want to be featured on my blog with your finished items, just shoot me an email. If you don't want to be featured but are still willing to share your pics, that's great too! Just let me know in the email if you want me to post your pics or not.

I love seeing finished products from my patterns. If you want to be featured on my blog with your finished items, just shoot me an email. If you don't want to be featured but are still willing to share your pics, that's great too! Just let me know in the email if you want me to post your pics or not.
Wednesday, December 5, 2012
More Headbands
Here are a couple more Tunisian Stitched Headbands and a knotted headwarmer. The headwarmer is for my neighbor's daughter. Hopefully it will fit. If not, it's a quick project that I can remake with a smaller hook. I made mine not as wide as the pattern calls for, but I think I will make another that is wider. I found the pattern as I was looking through Pinterest. The Knotted Headband pattern can be found here.
 |
| Tunisian Bamboo Stitch |
 |
| Tunisian Simple Stitch |
 |
| Knotted Headband |
Thursday, November 29, 2012
Tunisian Headbands

Here are some more Tunisian projects. I made these headbands using Tunisian crochet stitches in the round with a double ended crochet hook and two different colors so you can really see the effect of the different stitches.

This one is the honeycomb stitch. This is the same stitch that I used to make the blue scarf in the previous post. It is made by alternating Tunisian Simple Stitch (TSS) and Tunisian Purl Stitch.

The next one is made using a Tunisian Rib Stitch. You make this pattern by alternating TSS and Twisted Tunisian Simple Stitch. To make the twisted one you enter your hook into the vertical bar from the opposite direction as you would normally do with TSS. This pushes the two stitches together making vertical rows as you can see below.

My last headband is made using a Tunisian Cross Stitch. To make this pattern you skip the first bar, work a TSS in the next one then come back to the first bar and work a TSS, doing this for every pair of stitches. This crosses the stitches as you can see below.

I didn't know there were so many different things you can do with Tunisian Crochet. I'm still experimenting and learning new stitches.
Sunday, November 25, 2012
Tunisian Crochet Scarves
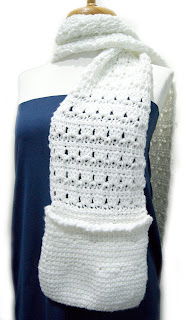
Lately I've been experimenting with Tunisian crochet. The first complete project I finished using a Tunisian stitch was this sparkly scarf. The pattern is called "Scarfaroo" from the book, Crochet Lace Innovations by Doris Chan . It has a pocket on one side to conveniently stash small objects with a couple snaps to close it up. The other side is supposed to have fringe according to the pattern, but I ran out of yarn at that point. I used Hobby Lobby's "I Love This Yarn". The drape of this scarf is really nice. I need to buy this book. I borrowed the book from the library a long time ago and never got around to posting a picture.


The second project is from Annie's Crafts. It is called Honeycomb Scarf, made with the honeycomb stitch. If you know how to do tunisian simple stitch and tunisian purl stitch, this will be a breeze. You just alternate simple stitch and purl all the way across each row. As I got used to doing the pattern, my stitches got a little more loose and the "honeycomb" was easier to see. I used Lion Brand's Hometown USA yarn. It's super bulky and I think I used a size K or L hook. I would suggest using a bigger hook for this yarn. It is kind of stiff, really thick, and super warm.


Tuesday, October 30, 2012
Lacy Shirt
This was a really quick work up. I found the pattern on Ravelry. You can find it on Lion Brand's website, it's called Crochet Bronze Beauty Top. The original pattern has long sleeves, but I think I will keep it just like this. I want to make one in another multicolored yarn with the sleeves.
This pattern didn't give me any problems, I just followed along and everything fell into the right places. It starts off with a foundation single crochet which they call a base ch/sc. The wording through me off a little, but once I realized it was just a foundation sc, it was fine. If you don't know that stitch, they have an explanation in the pattern stitches section to tell you exactly how to do it. Piece of cake! Let me know if you try this pattern.


This pattern didn't give me any problems, I just followed along and everything fell into the right places. It starts off with a foundation single crochet which they call a base ch/sc. The wording through me off a little, but once I realized it was just a foundation sc, it was fine. If you don't know that stitch, they have an explanation in the pattern stitches section to tell you exactly how to do it. Piece of cake! Let me know if you try this pattern.


Sunday, October 28, 2012
Green Bay Logo
Someone inquired about the pattern for the Green Bay logo that Debi made on the last Show & Tell. If you missed that post, here is a picture. She used my headwarmer pattern and made the logo to adorn it. The person inquiring also happens to be named Debi! Thank you to both of you!

So I emailed her and asked if she would be willing to share her pattern and this is what she said:
"Oh my, it's not a pattern but I'd be happy to tell you how I did it. I just crocheted a circle with the gold in single crochet, 4 rounds, then trimmed that in green to form the patch. I then half double crocheted a strip of white long enough to shape into a G and then attached that with needle and thread to the patch. That was it! I hope this helps."
Let's see, I will try to break it down and make a pattern from what she said. Before I get into that I want to tell you that after making this, I googled the logo and noticed that the green should be on the inside and the yellow on the outside. I will incorporate that into the pattern, so don't think I'm confused or have my colors mixed up even though I did it the other way. Either way looks fine to me, but I'm no expert. Now lets get started..
Notes: I used two different size hooks, I and F. I didn't join my rounds, making a continuous spiral, but you can join if you'd like.
Using size I crochet hook, start with Green, make a slip knot and chain 2
Rnd 1: 7sc in 2nd chain from the hook
Rnd 2: 2 sc in each of next 7 stitches of previous round for a total of 14 sc
Rnd 3: (sc in next st , 2 sc in next st) repeat for a total of 21 sc
Rnd 4: (sc in next 2 st, 2 sc in next st) repeat for a total of 28 sc
Here's where we change colors
Insert your hook into the next st and cut yarn as shown
 Tie the green and yellow in a knot close to your work
 You can crochet over the tails so you won't have to weave them in later.
Sc with yellow all the way around
Join to first sc
Fasten off and weave in ends.
To make the "G" change your crochet hook to size F
Make a chain of 30, turn
Hdc into 3rd chain from hook and each ch across
Slip stitch into last chain (you will have a hdc and sl st in the same ch)
Fasten off and weave in ends.
With wrong side facing, position your white strip into a "G" shape and pin in place.
 Using white yarn and a yarn needle, sew the "G" in place. When finished, I tied my two ends together just to make sure it won't come loose.
 Now we are ready to adorn a hat, bag, or headwarmer for a special fan.


So I emailed her and asked if she would be willing to share her pattern and this is what she said:
"Oh my, it's not a pattern but I'd be happy to tell you how I did it. I just crocheted a circle with the gold in single crochet, 4 rounds, then trimmed that in green to form the patch. I then half double crocheted a strip of white long enough to shape into a G and then attached that with needle and thread to the patch. That was it! I hope this helps."
Let's see, I will try to break it down and make a pattern from what she said. Before I get into that I want to tell you that after making this, I googled the logo and noticed that the green should be on the inside and the yellow on the outside. I will incorporate that into the pattern, so don't think I'm confused or have my colors mixed up even though I did it the other way. Either way looks fine to me, but I'm no expert. Now lets get started..
Notes: I used two different size hooks, I and F. I didn't join my rounds, making a continuous spiral, but you can join if you'd like.
Using size I crochet hook, start with Green, make a slip knot and chain 2
Rnd 1: 7sc in 2nd chain from the hook
Rnd 2: 2 sc in each of next 7 stitches of previous round for a total of 14 sc
Rnd 3: (sc in next st , 2 sc in next st) repeat for a total of 21 sc
Rnd 4: (sc in next 2 st, 2 sc in next st) repeat for a total of 28 sc
Here's where we change colors
Insert your hook into the next st and cut yarn as shown


Sc with yellow all the way around
Join to first sc
Fasten off and weave in ends.
To make the "G" change your crochet hook to size F
Make a chain of 30, turn
Hdc into 3rd chain from hook and each ch across
Slip stitch into last chain (you will have a hdc and sl st in the same ch)
Fasten off and weave in ends.
With wrong side facing, position your white strip into a "G" shape and pin in place.


Subscribe to:
Posts (Atom)