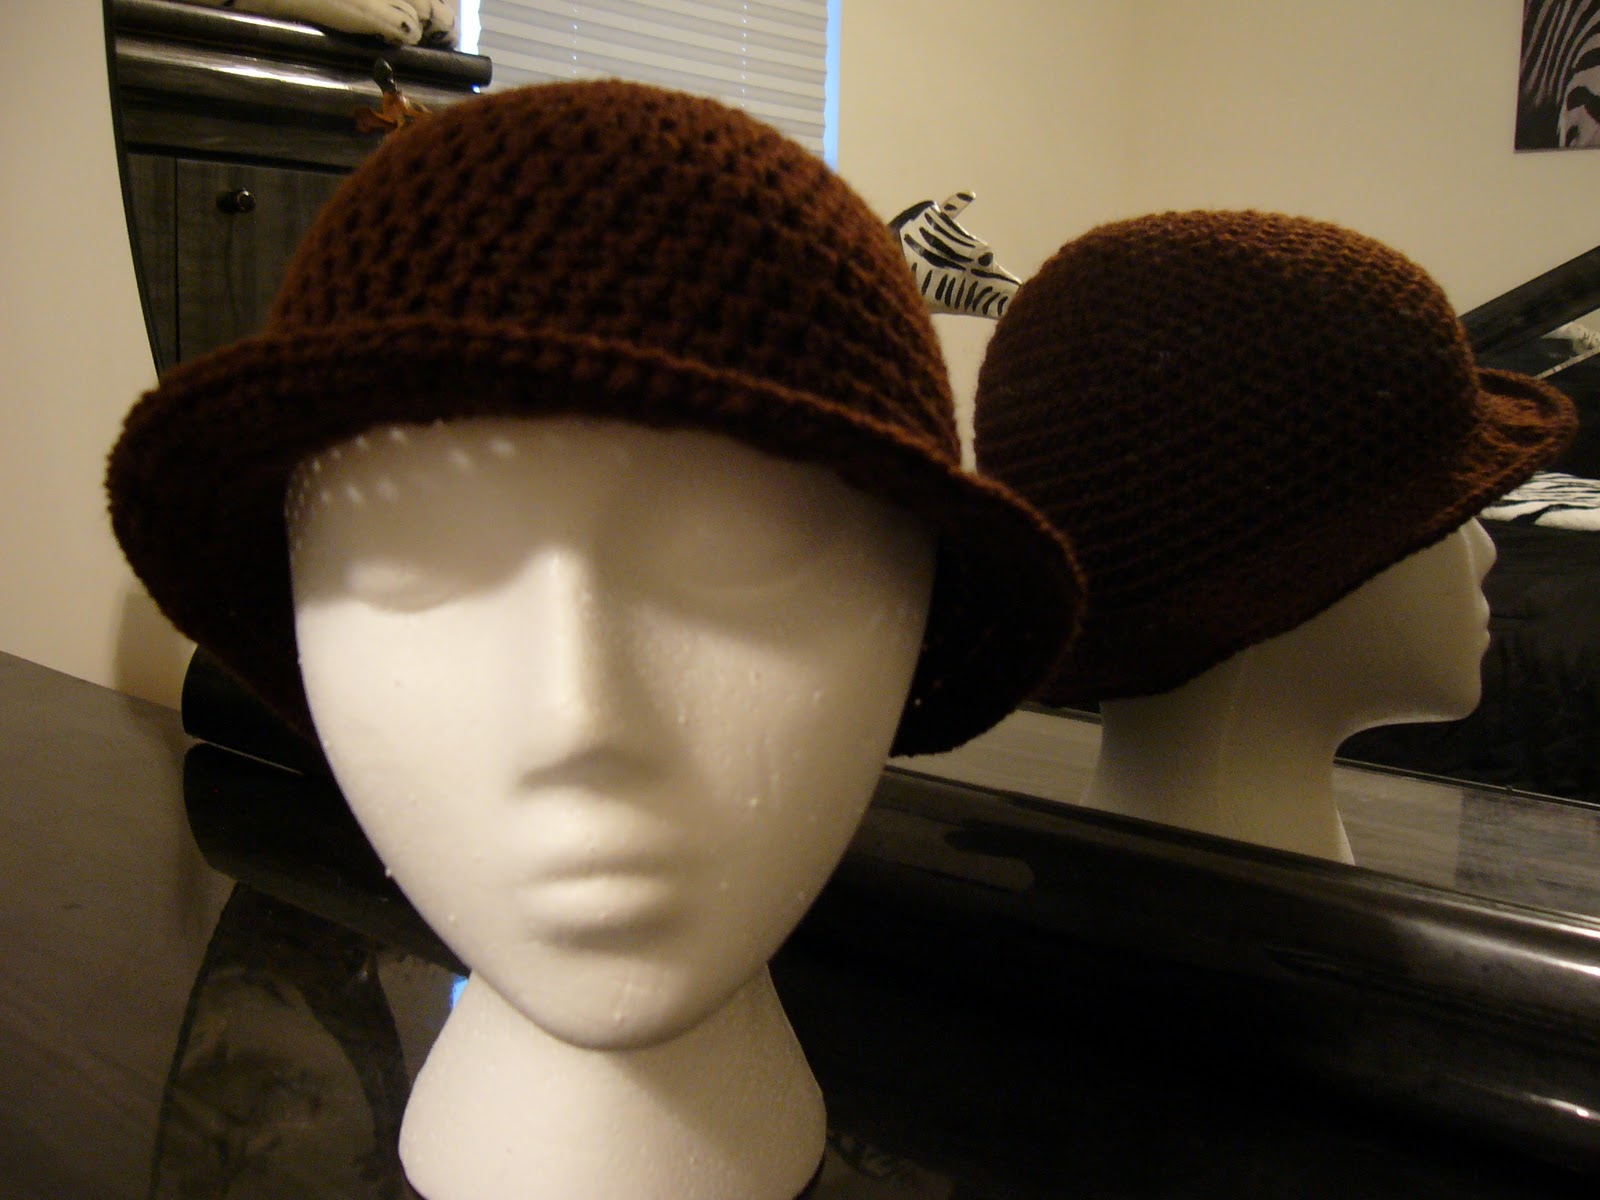
On our long road trip to Florida from Virginia, I had lots of time to crochet when I wasn't driving, of course. I only brought one skein of yarn, so unfortunately everything is the same color. I didn't get a chance to splurge at any craft stores. I did get to hit one store in Tallahassee called Beadz. They had so many beads and things, I didn't know what to do! They had a beginner's class that I would've liked to attend, but we were leaving the day before the class. Maybe next time. So on to my new hats. The first one was an experiment and a tragedy. I think I'll redo that one someday. I'm almost embarrassed to post a pic but here it is..
The next one is not so bad. I actually like it. It's a basic beanie with a brim. The brim is crocheted with two strands so it is a bit stiff.
This last one was also an experiment, but came out much better than the first. It has a floppy brim all the way around. I think I'll make another with a bigger floppier brim, like a sun hat.
Now if you're wondering about the hoop, I did make one. It's made out of polyethylene tubing that I got from Lowes. I was going to do a tutorial but you can click here for that. The best part of making a hoop is making it pretty. I used vinyl and duck tape. This hoop was requested by my friend, Kat. She had to have silver, and my silver duck tape doesn't go on as smooth as the other tapes, but it's still pretty. I even personalized it for her. What do you think?
A craft blog with free crochet patterns, do it yourself projects, jewelry, beads and other creative ideas. Join me in my crafting adventures.
Tuesday, June 29, 2010
The Best Bead Giveaway!
I know I've been slacking with the blog posts this month. I took last week off to visit some family in Florida. On that long road trip (14 hours), I made three hats. Those hats will be in the next post... Right now I want to talk about this fantastic giveaway that I found through another blog (Dana's Jewelry Design).
Denise Yezbak Moore Bling it On! is having a generous giveaway on her blog, It's not too late to enter, the contest will be over on Friday, July 2nd, so hurry! Visit her blog to see the rules and the beautiful beads she is offering. It's over $350 worth of beads!! Amazing!
Monday, June 7, 2010
"Don't eat with your eyes"
Have you ever heard the saying, "Don't eat with your eyes?" My parents would say that to me all the time. It's when you see the yummy food, put too much on your plate, and then you can't finish it. Well, that's kinda what's happening with my crafts lately. I want to try so many different things that I can't finish one project. I need to focus on one at a time. I was doing well with that for a while until I got distracted here and there and ended up with all this "food" on my plate. The problem is that I don't have enough time to do it all. I did finish one small project this week, and that is my new corkscrew earrings.
This past weekend I was trying to teach myself how to crochet with beads. I got this book from the library called Beaded Crochet Designs
by Ann Benson. It was a little frustrating at first, but I think I got the hang of it today. I was trying to make a bracelet, but I didn't put enough beads on the string, so this is what I have.
I think it looks pretty cool. It's very flexible. I guess I will have to start over and string more beads. I must say, I thought it was going to be easy, but it's definitely not so easy. The first time I tried, it was horrible and confusing because I used all the same color beads. The alternating beads made it much easier to see and work with. I also put some fabric stiffener at the end of the string to make it easier to string the beads. Any white glue would do the same. Maybe next time I will have a finished product of my beaded crochet.
This past weekend I was trying to teach myself how to crochet with beads. I got this book from the library called Beaded Crochet Designs
I think it looks pretty cool. It's very flexible. I guess I will have to start over and string more beads. I must say, I thought it was going to be easy, but it's definitely not so easy. The first time I tried, it was horrible and confusing because I used all the same color beads. The alternating beads made it much easier to see and work with. I also put some fabric stiffener at the end of the string to make it easier to string the beads. Any white glue would do the same. Maybe next time I will have a finished product of my beaded crochet.
Thursday, May 20, 2010
Engraved Washer Necklace
So I have this dremel tool and was dying to try it on something. I bought a bunch of washers from Home Depot in hope of making some cool necklaces. So this is my first try at engraving with the dremel. It was a lot harder than I thought and not as pretty as I thought it would be. I used the diamond engraving attachment to engrave on a steel washer. The washer is about 2 inches wide. I decided to engrave it with my daughter's name, Isabel.
I used cotton yarn and added some glass beads for some color. I was thinking of getting some diamond glaze to make it shinier, but when I showed it to my daughter she said "Awesome!" and took it away. It feels good to have my work appreciated.
Sunday, May 16, 2010
Wedding Season
One of my best friends just got engaged to be married! Congratulations Kat! It is such an exciting time especially the planning and the time right before the wedding. Every bride wants the perfect wedding and the perfect weather. Well, you can only do so much, right? I got married in August of last year. Some may still call us newly weds. For our wedding, I did most of the planning and all of the decorating! It was a lot of work, but I also enjoyed it very much, and I saved a lot of money! Since it is wedding season, I decided to share some of the crafts that I made for our wedding.
We'll start with the invitation. I made a bunch of different ones until I was finally satisfied with this one. I used a golden heavy paper for the background. I cut two slits in the gold in the top left and bottom right corners to hold the other paper in place. There was no glue involved. The top paper is paper that you would print pictures on. It has a nice gloss to it. I found the image of the rings online and edited it using Paint.net, which is a program that you can download for free. I cut each and every paper! That was the hardest part of this project. If I were to do it again, I would invest in a paper cutter. There were also two cards that went with the invitation. One had all the info for times and places and the other was an RSVP card to be returned with a reply so I had a semi accurate account of guests. I also included a return envelope with a stamp. I wanted it to be as simple and convenient for the guests as possible.
The place cards were also a lot of work. These were made after getting the RSVP cards back. Again I cut and folded all of these by hand. The outside is the hand written name in calligraphy and on the inside their table number and a note of thanks in the guest's original language which was either English, Spanish, or Filipino. I was a little upset at the guests who didn't show, because I feel like I wasted time and energy in making their place cards so personal. But, it happens, people won't show even if they say they will. I'm over it now!
I was very pleased with how this card box turned out. Before this one, I tried to make one in the shape of a wedding cake using three boxes, but I didn't like how it looked. I really like this one though, I used a medium sized box and cut a hole in the top large enough to fit a large card. Then I covered the whole box with blue wrapping paper. I used white ribbon to add a splash of color, then I hot glued some roses that I made from blue ribbon and a gold ribbon bow on the top. The word, Cards, was made from the gold background paper of the invitations. I drew the word and cut it out with a craft knife. It took a few tries until I had it perfect.
The is the gift table. A simple table decorated with blue streamers and blue balloons. There were a few people who didn't put their cards in the card box, but many more who read the box and inserted their card. The main table was also decorated with blue and white streamers and balloons. I can't find a picture of the centerpieces. It was a small glass vase with blue water tinted with food coloring and a white floating candle. The vase sat on a round mirror that was about 12 inches in diameter.
In slavery times, black people made their own traditions for marriage. One is jumping the broom. During this ceremony, the couple will sweep away their old life and leap into their new family together. I found this broom in an Asian food store. It was very cheap. I decorated it with our colors. I used blue ribbon and a gold wire spiraling down the handle of the broom. I embellished it with ribbon flowers and bows that I made. I also used gold glitter hair spray for the bristles of the broom.
The bouquet was made with fake flowers that I picked up from Michaels Craft Store. I arranged them and added a few embellishments to add some color. I used some tulle for the outside and wrapped the stems in tape for a handle.
I didn't get a good picture of the flower girl's head piece. I used flowers from Michaels that I cut and glued to a wire that I shaped to fit my daughter's head. I also made her bouquet which was similar to mine, but with some blue flowers to match her headpiece. Isn't she lovely?
There are so many resources out there and online for ideas for your own wedding. You can save so much money by doing some things yourself, and you might have fun doing it! You could also recruit some of your bridesmaids or family members to help.
We'll start with the invitation. I made a bunch of different ones until I was finally satisfied with this one. I used a golden heavy paper for the background. I cut two slits in the gold in the top left and bottom right corners to hold the other paper in place. There was no glue involved. The top paper is paper that you would print pictures on. It has a nice gloss to it. I found the image of the rings online and edited it using Paint.net, which is a program that you can download for free. I cut each and every paper! That was the hardest part of this project. If I were to do it again, I would invest in a paper cutter. There were also two cards that went with the invitation. One had all the info for times and places and the other was an RSVP card to be returned with a reply so I had a semi accurate account of guests. I also included a return envelope with a stamp. I wanted it to be as simple and convenient for the guests as possible.
The place cards were also a lot of work. These were made after getting the RSVP cards back. Again I cut and folded all of these by hand. The outside is the hand written name in calligraphy and on the inside their table number and a note of thanks in the guest's original language which was either English, Spanish, or Filipino. I was a little upset at the guests who didn't show, because I feel like I wasted time and energy in making their place cards so personal. But, it happens, people won't show even if they say they will. I'm over it now!
I was very pleased with how this card box turned out. Before this one, I tried to make one in the shape of a wedding cake using three boxes, but I didn't like how it looked. I really like this one though, I used a medium sized box and cut a hole in the top large enough to fit a large card. Then I covered the whole box with blue wrapping paper. I used white ribbon to add a splash of color, then I hot glued some roses that I made from blue ribbon and a gold ribbon bow on the top. The word, Cards, was made from the gold background paper of the invitations. I drew the word and cut it out with a craft knife. It took a few tries until I had it perfect.
The is the gift table. A simple table decorated with blue streamers and blue balloons. There were a few people who didn't put their cards in the card box, but many more who read the box and inserted their card. The main table was also decorated with blue and white streamers and balloons. I can't find a picture of the centerpieces. It was a small glass vase with blue water tinted with food coloring and a white floating candle. The vase sat on a round mirror that was about 12 inches in diameter.
In slavery times, black people made their own traditions for marriage. One is jumping the broom. During this ceremony, the couple will sweep away their old life and leap into their new family together. I found this broom in an Asian food store. It was very cheap. I decorated it with our colors. I used blue ribbon and a gold wire spiraling down the handle of the broom. I embellished it with ribbon flowers and bows that I made. I also used gold glitter hair spray for the bristles of the broom.
The bouquet was made with fake flowers that I picked up from Michaels Craft Store. I arranged them and added a few embellishments to add some color. I used some tulle for the outside and wrapped the stems in tape for a handle.
I didn't get a good picture of the flower girl's head piece. I used flowers from Michaels that I cut and glued to a wire that I shaped to fit my daughter's head. I also made her bouquet which was similar to mine, but with some blue flowers to match her headpiece. Isn't she lovely?
There are so many resources out there and online for ideas for your own wedding. You can save so much money by doing some things yourself, and you might have fun doing it! You could also recruit some of your bridesmaids or family members to help.
Wednesday, May 5, 2010
New Accessories
Here's some new accessories that I came up with. A silver thread and glass bead necklace and earrings, and a set of blue cotton earrings. What do you think?
Tuesday, April 27, 2010
Locks of Love Donation
Locks of Love is a non-profit organization that provides hair for children who are suffering from long term medical hair loss. This is my daughter's second generous donation. The hair has to be at least 10 inches for donation. She has very curly hair, but if you stretch it out it really is 10 inches. Last time she donated, she had a little over 12 inches! By next year, she'll have half of it back.
Here she is sporting her new look!
Saturday, April 24, 2010
Rasta Hats
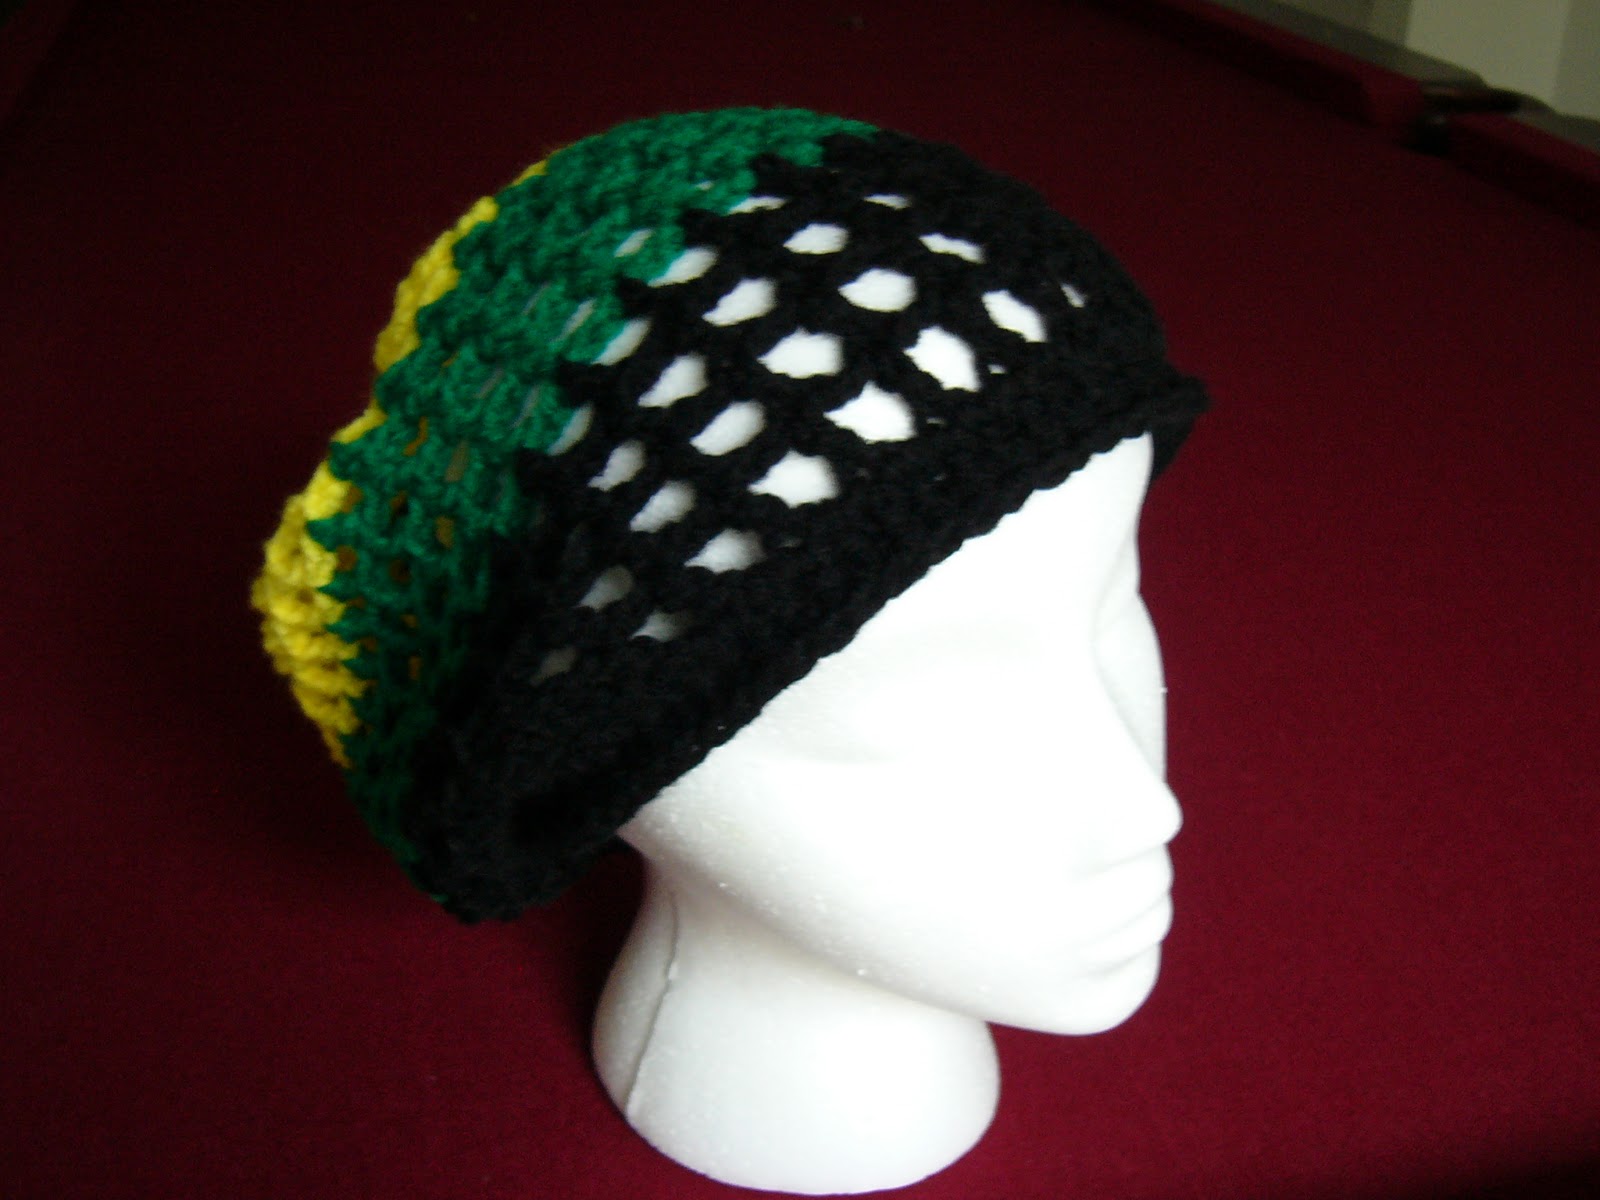
I made one of these hats for my daughter a few months ago. She really liked the fact that she didn't have to worry about her hair. All she had to do was put all her hair into the hat and that was it. These hats are perfect for bad hair days or even to keep cool if you have a lot of hair.
This one has a Jamaican flag on it. Well, it's a circle, so it's not really the flag, but I think it looks cool. It took me a while to figure out how to do it, but it wasn't that hard. I made a ring by chaining 5 and joining. Then I made four triangles with the green and black. I started with three single crochets through the ring. After all four triangles were done, I connected them to each other using a single crochet on the right side of the work with the yellow yarn to form the "X". I wish I would've thought about making a tutorial when I made it. Maybe I'll make another one. Both hats are made with acrylic yarn and they have round cord elastic in the brim.
Here I am modeling my work:
I am going to post these in my online store to sell. Check out my store: PerfectMix Creations
This one has a Jamaican flag on it. Well, it's a circle, so it's not really the flag, but I think it looks cool. It took me a while to figure out how to do it, but it wasn't that hard. I made a ring by chaining 5 and joining. Then I made four triangles with the green and black. I started with three single crochets through the ring. After all four triangles were done, I connected them to each other using a single crochet on the right side of the work with the yellow yarn to form the "X". I wish I would've thought about making a tutorial when I made it. Maybe I'll make another one. Both hats are made with acrylic yarn and they have round cord elastic in the brim.
Here I am modeling my work:
I am going to post these in my online store to sell. Check out my store: PerfectMix Creations
Tuesday, April 20, 2010
My week off.
Wouldn't it be great to have a whole week off from work? I could do so many things that I want to do, but don't usually have time for. I could finish projects. I could create new works of art and recreate old ones. Well, I had a week off, and it wasn't even close to great. I was home all last week, but I was so sick I couldn't do anything. I didn't even check on my blog! Strep throat is not fun! I had a fever for three days with chills and the shakes. It was horrible! When I finally started to feel better, I just wanted to clean and sanitize so no one else in the house would have to go through what I went through. I was wishing for a week off from work for a while, so the moral of the story is... Be careful what you wish for. You just might get it, and it might not be what you expected or even wanted after all.
Friday, April 2, 2010
Cute Earrings! (tutorial)
I saw some cute crocheted earrings in this book, Fly Tops & Funky Flavas (Get Your Crochet On!)
. I checked out the book from the library, but I had to return it before I had a chance to make the earrings. I just ordered the book today on Amazon
, but I couldn't wait for it to make the earrings. So I got some supplies and came up with these:
This will be my first tutorial post. I hope I can be clear with the instructions, if not just ask in the comment section. I'm sure there is a better way to make these earrings but here's my way, amateur style. I picked up my supplies from Joann's. I was actually looking for some plastic rings in the larger size, but i got some wooden rings instead. I wasn't sure how it would work, because I thought they might be too heavy. They turned out to not be heavy at all.
I also got some earring hooks. They are gold plated, good for sensitive ears like mine. They also had some sterling silver hooks as well. (Sorry for the blurriness, I'm having issues with my camera.)
I should have gotten some type of metallic thread or yarn, but I had to use what I have for now. I used acrylic yarn and a size G hook.
Start by threading the earring hook onto the yarn, then move it out of the way until you need it.
Make a slip knot on the hook with the yarn.
Make a slip stitch around the ring.
Single crochet around the ring until it is completely covered with your yarn.
Join to the first single crochet.
Find your earring hook and move it down to your earring, pull up the loop so the earring hook can fit through.
Pull it through and tighten the yarn.
Cut the yarn with a tail long enough to weave in.
Weave it in and you're done!
I think I might be ready to crochet with beads. That would make these earrings have some bling!
This will be my first tutorial post. I hope I can be clear with the instructions, if not just ask in the comment section. I'm sure there is a better way to make these earrings but here's my way, amateur style. I picked up my supplies from Joann's. I was actually looking for some plastic rings in the larger size, but i got some wooden rings instead. I wasn't sure how it would work, because I thought they might be too heavy. They turned out to not be heavy at all.
I also got some earring hooks. They are gold plated, good for sensitive ears like mine. They also had some sterling silver hooks as well. (Sorry for the blurriness, I'm having issues with my camera.)
I should have gotten some type of metallic thread or yarn, but I had to use what I have for now. I used acrylic yarn and a size G hook.
Start by threading the earring hook onto the yarn, then move it out of the way until you need it.
Make a slip knot on the hook with the yarn.
Make a slip stitch around the ring.
Single crochet around the ring until it is completely covered with your yarn.
Join to the first single crochet.
Find your earring hook and move it down to your earring, pull up the loop so the earring hook can fit through.
Pull it through and tighten the yarn.
Cut the yarn with a tail long enough to weave in.
Weave it in and you're done!
I think I might be ready to crochet with beads. That would make these earrings have some bling!
Monday, March 22, 2010
Spring Mesh Hats
Here's two mesh type hats that I just made. These hats are perfect for spring or fall weather.
I think I might work on some dread holding Rasta hats next. I made one for my daughter a while back and she really liked it. She could fit all her hair in it so it wouldn't look a mess when I didn't do her hair.
Wednesday, March 17, 2010
Irish Shamrock
Monday, March 15, 2010
Look what I made!
I have been so busy trying to come up with items for my online store, so I can quit my day job. Just kidding about the quitting part, I'm not even close to ready for that! Maybe one day. I wonder if I made my hobby my job if I would still like doing it? hmm..
Anyway, I've come up with a few new things. I made this cute headband. It's made with cotton crochet thread and gold metallic thread. I'll probably make some more of these.

This is a lovely hat with an applique of crocheted "buttons". I actually used the buttons to cover up the seam. It's made with Caron Simply Soft
acrylic yarn. The color is dark Sage.
This is the latest piece that I've been working on, and still am working on. I need to finish the straps for the bottom. It started out as just a bikini top, but then I decided to come up with some kind of matching bottom. It's made with worsted weight 100% cotton yarn by Peaches and Creme. I'm not sure how well it would do in water. It seems like it would soak up a lot of water and get heavy. I'm thinking I should make the straps longer for the bottom.
Anyway, I've come up with a few new things. I made this cute headband. It's made with cotton crochet thread and gold metallic thread. I'll probably make some more of these.
This is a lovely hat with an applique of crocheted "buttons". I actually used the buttons to cover up the seam. It's made with Caron Simply Soft
This is the latest piece that I've been working on, and still am working on. I need to finish the straps for the bottom. It started out as just a bikini top, but then I decided to come up with some kind of matching bottom. It's made with worsted weight 100% cotton yarn by Peaches and Creme. I'm not sure how well it would do in water. It seems like it would soak up a lot of water and get heavy. I'm thinking I should make the straps longer for the bottom.
Subscribe to:
Posts (Atom)