Pages

Thursday, December 19, 2013

Crochet Neck Tie Pattern


Materials:
·         Worsted weight yarn, I used Caron Simply Soft
·         Size G hook
·         Needle for weaving in ends


NeckTie:
Begin with a magic circle, ch1
 1: 2hdc in circle, ch1, turn. Pull the circle closed. (2 sts)
 2: 2hdc in each stitch, ch1, turn. (4 sts)
 3: 2hdc in first stitch, 1 hdc in next 2 stitches, 2hdc in last st, ch1, turn. Increase made on first and last stitch. (6 sts)
 4: 2hdc in first stitch, 1 hdc in next 4 stitches, 2hdc in last st, ch1, turn.  (8 sts)
 5: 2hdc in first st, 1 hdc in next 6 sts, 2 hdc in last st, ch1, turn. (10 sts)
 6: 1 hdc in each st across, ch1, turn. (10 sts)
 7: Repeat row 6 until piece measures about 18.5 inches long from point.
………. Estimated row numbers below (you may be on a different row number)……….
58: 1hdc in first 4 sts, hdc decrease together for next two sts, 1hdc in last 4 sts, ch1, turn.  (9 sts)
59-66: 1hdc in each stitch across, ch1, turn.  (9 sts) Maintain st count over 8 rows.
67: 1hdc in first 4 sts, hdc decrease together, 1hdc in last 3 sts, ch1, turn.  (8 sts)
68-75: 1hdc in each stitch across, ch1, turn.  (8 sts) Maintain st count over 8 rows.
76: 1hdc in first 3 sts, hdc decrease together, 1 hdc in last 3 sts, ch1, turn. (7 sts)
77-84: 1hdc in each stitch across, ch1 turn. (7 sts) Maintain st count over 8 rows.
85: 1hdc in first 3 sts, hdc decrease together, 1hdc in last 2 sts, ch1, turn. (6 sts)
86-170: 1hdc in ea st across, ch1 turn. (6 sts) You can continue to desired length. Mine is about 61 inches long.
Finish off and weave in ends.


Tag Area:
  I wasn’t sure what to call this part. It’s usually where a tag is and it holds the smaller end behind the wide part.
I put mine about 11 inches from the point around row 34.
Join the yarn in one of the stitches near the edge, but not the very edge. Sc in same stitch and one stich next to it, ch1, turn. (2 sts)
Hdc in ea, ch1 turn. (2st)
Repeat last row until you are near the other side but not over the edge of the tie (about 7 rows).
Insert hook into first st on tag, slip stitch into a stitch near the edge of the tie, sl st in next stitch, going through both layers (the tag and edge of the tie).

Finish off and weave in ends. 

  I love seeing finished products from my patterns. If you want to be featured on my blog with your finished items, just shoot me an email. If you don't want to be featured but still want to send me pics, that's great too! Just let me know in the email if you want me to post your pics or not.


daperfectmix@gmail.com

Sunday, December 15, 2013

Crochet Christmas Wreath

  If you follow me on Pinterest, you probably noticed that I've been looking at Christmas wreaths lately- specifically crocheted Christmas wreaths. After looking at some inspiring pins, I started making my own. I used different ideas and patterns that I saw and pieced them together for my wreath.


  Here is a link to the wreath pattern, it comes from a blog called Sew is Me. I didn't have bulky weight yarn so I just used two strands of the worsted weight, green yarn that I had stashed away. Crocheting around the wreath is not much different than crocheting around a small loop for earrings, but it seems more complicated because the wreath is HUGE in comparison. It takes a little getting used to.


  I did a search to find a poinsettia pattern and I loved the look of this one. You can find it on PlanetJune Craft Blog. I only made the smallest flower (style A on her blog). The tiny pearl in the middle is actually a pin and that's how I stuck it to the wreath. I pinned rather than glued all of the adornments so that I can use them in other things later, if I decide to.


  I couldn't resist the candy cane, and it is so easy to make. The video tutorial by Teresa Richardson can be found here on YouTube. I didn't have a pipe cleaner, but I did have some wire handy and it worked just as well.


  My little Sackboy elf is chillin' on the bottom of the wreath. Unfortunately, the free pattern that I found for this a long time ago is no longer available. It was some sort of legal thing and the blogger decided to remove it. My sons are so tempted to play with this guy. If you don't know what a Sackboy is, it's from the Sony Play Station game LittleBigPlanet.


  I had the bow from an old gift and the lettering came from Walmart. I did a lot of changing and rearranging, adding and taking away but I think I'm finally done. At one point, I wanted to make the sackboy look like he was trying to climb up and steal the candy cane, but I settled for this look. I can always change it, but for now it's ready to go on the door. 

I wish you all a Merry Christmas and hope you enjoy the holidays and time with loved ones! 

Friday, November 8, 2013

Another Infinity Scarf

   Here is another Infinity Scarf that I finished today. This will be a gift for a friend. I don't know what to call the adornment piece that I made to wrap around it. It's just a rectangle piece made with treble crochet stitches. I alternated each row with front post and back post stitches, then sewed the button on. This makes it adjustable and removable.


Wednesday, November 6, 2013

Infinity Scarf and Arm Knitting

  I finally learned how to knit. It was maybe my third try, so I was somewhat familiar with it. I do better by watching someone else, so I watched a bunch of YouTube videos one weekend until I got it down. My purl stitch is still rusty, but I'll get it soon. One of the videos I saw was "arm knitting." I thought that was very interesting. All you need is yarn. Your arms are your knitting needles -why didn't I think of that? Well, I did just learn how to knit after all. So I tried it out and made an infinity scarf. Not bad for my first try! Have you tried arm knitting? Here is one of the videos that I watched:  -click here-.

  I love infinity scarves. There are so many possibilities. 


Thursday, October 17, 2013

My "go to" books, Get Your Crochet On!

   I always seem to go back to these books when I'm looking for a new project. I love the styles and of course how you can make it your own, but that can be true with any pattern. My latest projects were straight from the books. The first time I use a pattern, I don't usually make adjustments or changes. There are rare exceptions, but these were followed as written. The first one is from Afya Ibomu's "Get Your Crochet On! Hip Hats & Cool Caps". It is called Superfly. Ok, I did make one change and that was that I used a chunky yarn instead of using two strands of worsted weight like the pattern says. The hat keeps it's form well and can be molded into different looks. Here is my version of it:


   The second project is a garment from Afya Ibomu's other book, "Get Your Crochet On! Fly Tops & Funky Flavas". This one is called Dashiki. This book features many different tops and accessories to choose from. I was thinking of making another version of this, with tighter stitches so it is not so mesh-like. I used Caron's Simply soft yarn. I love the contrasting colors. There is some purple in there, but it's a little hard to see in between the black and pink.


   If you're interested, I got my books from Amazon and found that they have the cheapest prices for them. Here are links to the books on Amazon if you want to check them out.


Saturday, October 5, 2013

Nina's Skirt

   I completed another skirt. I used the same free pattern as the tan skirt in a previous post. For this skirt, instead of weaving the cord through the stitches on the top, I folded the top on the inside and sewed a casing with the yarn. It makes it a little sturdier when you are pulling the cord tight. This was actually requested by a customer and I think I like it better this way. Here is the completed skirt.


Tuesday, October 1, 2013

Show & Tell Headwarmers

   I've been so behind on my Show & Tell posts. I guess since the government is shutdown I have a little more time for my hobbies.  Sara sent me some pictures of her beautiful crochet head warmers and scarf. She used my free pattern that you can find here. She also had some tips for women with bangs who don't want a wide head warmer. She said "if others ask about narrowing the headband, you can narrow it to 10 dc's wide, and it'll still cover your ears." Great tip!

   The first one is made from two strands of a sport weight wool.


  This warmer and scarf was made from a teal green, Paton's Promise, which is a fuzzy sport weight yarn.


   They look so cozy! Thank you, Sara, for sending the pics. It took forever to post, but I finally got to it.

I love seeing finished products from my patterns. If you want to be featured on my blog with your finished items, just shoot me an email. If you don't want to be featured but are still willing to share your pics, that's great too! Just let me know in the email if you want me to post your pics or not. 

Friday, September 13, 2013

Crochet Skirt

   I got this pattern as a free download from Ravelry.com. It's called EmmaJean's Minty Green Skirt. It took a while for me to finally finish it, but it was worth the time. I used Hobby Lobby's "I Love this Cotton" in Taupe, so mine is not minty green, obviously. This cotton is nice and soft. I didn't make the frill as long as the pattern calls for. (I'm short and so is the person I was making it for) I was actually thinking of continuing and making it a maxi. Hmm. I'll think about it.


Tuesday, September 3, 2013

Embroidered Name Tag

  My first embroidery project came out better than I expected!

  We got this "hand-me-down" book bag that was in really great shape. My only issue with it was that it had someone else's name on it, as you can see in the picture below. I blurred out the last name, but you can see it goes across the whole top part. My husband told me to just cross it out and put our son's name but I know it would look horrible and it would bother me every time I look at it.


   So I decided to give embroidery a try. It's not so hard. I used felt and embroidery thread. I colored his name on the felt with a sharpie the way I wanted it to look, using some fancy font in Microsoft Word. Then I did a back stitch along the border of the letters, then a fill stitch to fill it in. I don't think fill stitch is the correct term, but it fills in the letters, so that's what I'm going with.


   The border is just single crochet around. I started to do the "fill stitch" around the edge, but it just wasn't working out for me.  I didn't realize that I had yellow felt until after I was finished. Oh well, even though it doesn't match, I think it looks better than crossing out the name. I glued on the finished piece with some hot glue. Wala!


Saturday, July 13, 2013

Crochet Tops

  I usually do a pretty good job of keeping my work life, home life, and hobbies separated, but lately they've been overlapping. So I'm back after being "missing in action" for quite some time. Although I haven't updated my blog for a while doesn't mean I haven't been crocheting. I've completed two tops and I'm working on some other orders as well.

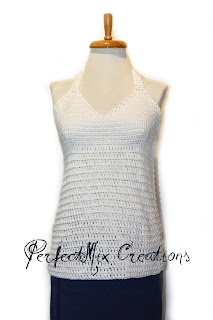
  The first pattern is a Halter Top that came from the book, Contemporary Crochet: 37 European Designs, by Sys Fredens. It's found on page 48 and works up pretty fast. I used worsted weight cotton yarn. The only changes I made was that I made the bust area a little smaller and made the top longer. It came out nice. I think I will put a lining in the bust part so I wouldn't have to wear something under it. It's not too lacy but I wouldn't want to show anything extra, if you know what I mean.


  The second top doesn't have a pattern. Well, I did use a specific stitch, but I winged it for the actual shape and construction of the shirt. Originally, I was just going to make two rectangles and attach them together, minus the neck and armholes. As I was working on the front, I decided to make the neckline more of a neckline. I did that by continuing my stitch pattern on the sides that go up the shoulder, and single crocheting in the middle. The backside is just a rectangle. The stitch that I used is from the book Crochet! Techniques, Stitches, Patterns, by Marie-NoĆ«lle Bayard. The stitch is called Closed Garlands and it's found on page 127. I think this was a good stitch for this shirt. I really like the look of this stitch.


Sunday, April 28, 2013

Show & Tell

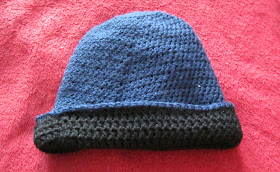
  Rachel sent me her finished items from my Quick Easy Winter Beanies pattern. This is her first ever crocheted hat and I'm so honored that she chose my pattern! It looks like it turned out great. She said she combined two beanies to make a reversible beanie with two different colors to choose from, or you can flip the bottom up like it shows in her picture. Brilliant! Great job, Rachel, and thanks so much for sending pictures!


  I love seeing finished products from my patterns. If you want to be featured on my blog with your finished items, just shoot me an email. If you don't want to be featured but are still willing to share your pics, that's great too! Just let me know in the email if you want me to post your pics or not. 


Saturday, April 6, 2013

Autism Awareness Scarf

Image from http://adamsfrood42.angelfire.com/Kamaa-Nhanda_Designs.html
  This is the other big project that I was talking about in a previous post. This took a lot of patience and time. The final piece is always such a great reward for all the hard work.


  The scarf was requested by a coworker for his son. I found the pattern on Ravelry and it can also be found at this link. It is actually a chart and is made using a Tunisian Crochet Simple Stitch. When I finally figured out how to do it, it became pretty repetitive. All I had to do was follow the chart. I repeated the chart one time, but I think I should have made the scarf a little longer. The pattern says to make two panels and stitch them together back to back. I did not want to make another panel since the first one took so long. Instead, I cut a length of fleece and stitched it to the back. The wrong side of the stitch looks like this, which is why it would need to be covered.


  I attached the fleece after blocking. I tried to take pictures, but my camera didn't like all the black. I guess it was too dark. I'm pretty happy with how it turned out. It was really neat to see the picture coming together in the beginning. I have to admit though, about halfway through I was ready to be done, but I kept on and finished the project. If it wasn't requested by someone else, I may have abandoned it.


Sunday, March 17, 2013

Show & Tell

   Karen sent me pictures of her floppy sun hats made from my free pattern. They look great! She listed them on ebay.com and can be found by the username "hillbubba". Check out all her listings! Last I checked, I didn't see the sun hats, so maybe they have been sold! How exciting! Thanks for the pictures, Karen!


  I love seeing finished products from my patterns. If you want to be featured on my blog with your finished items, just shoot me an email. If you don't want to be featured but are still willing to share your pics, that's great too! Just let me know in the email if you want me to post your pics or not. 


Saturday, February 23, 2013

Brett's Viking Hat

   I have recently been challenged with two projects. One is finally done and the other is very close (you will see in the next post). Brett sent me a picture and asked if I could make him a Viking hat with a beard. I almost bought a pattern for the hat, but decided to give it a try before doing that. The first try was a fail, but the second came out pretty good. I found a free pattern for the beard on Ravelry at this link. I also found a free pattern for the horns at this link. I stuffed the horns so they would keep their shape. I really like how it came out.


Wednesday, February 13, 2013

Perfect Fit

  Remember the Cloche that I made to felt? It shrunk to the perfect size for my little neighbor. I didn't get a chance to adorn it with anything, but it still looks cute on her.. or maybe she makes the hat look cute. Either way, I think it's cute. She's adorable!


Saturday, February 2, 2013

Show & Tell

  Liz sent me some pictures from her visit at the Inauguration in DC this year. She made a red white and blue cloche from my Classic Cloche pattern and adorned it with some Obama buttons. Very creative! She even made a scarf to match. Thank you for the pictures, Liz. I'm glad you and your husband had a great time and a safe trip. The hat looks great on you!


  I love seeing finished products from my patterns. If you want to be featured on my blog with your finished items, just shoot me an email. If you don't want to be featured but are still willing to share your pics, that's great too! Just let me know in the email if you want me to post your pics or not. 


Wednesday, January 23, 2013

First Felt

  I've never felted anything before. You will probably be able to tell after you see the pictures. I bought some Wool of the Andes from Knit Picks and decided to try it out. The wool is 100%  Peruvian Highland Wool. It didn't say super wash so I knew it would felt when washed. The first thing I did was crochet a cloche. I went up two hook sizes, but when I was done it seems to fit almost too good. Maybe the yarn was too bulky, or maybe I need to reevaluate my pattern. There was a little room for shrinkage, but I now know that I need way more room for shrinkage. Here is the before picture.


  I felted the cloche in the bathroom sinks. I used my sink for hot water and my husband's sink for cold water. I put a little dish soap in the hot water. I scrubbed, squished and agitated the cloche in the hot water, then in the cold water, going back and forth a few times until the wool looked felted. It was a lot more work than I thought. When I was done I squeezed the water out and rolled it in a towel to remove any excess water. I tried to put the cloche on my Styrofoam head to dry, but it did not fit. I left it to dry, standing up, so it wouldn't lose it's round shape. It took a really long time to dry. The finished piece, will probably fit a young child. I'm still thinking of what to embellish it with. I think a ribbon around would look nice and classy.